ESXI Raspberry Pi
I would of never thought that I could set up a lab for ESXI on something as simple as the Raspberry Pi, but I am glad that I was wrong. I currently have a 4gb Raspberry Pi 4 and an 8gb version as well, and my goal is to set up an EXSI cluster using those two devices. That alone will be a great bit of experience to have under my belt.
The end goal of this project is to setup this cluster under ESXI, and to also incorporate Kubernetes and docker wit this cluster. First thing first, lets get ESXI on the Raspberry Pi’s.
I followed the blog post go go along with the video. The accompanying video will be at the end of the blog post, and it is fantastic to follow along with. I will accomplish some of these options differently with more of accomplishing everything in Linux.
Raspberry Pi Out-of-the-box-Prep
You will need the Raspberry Pi OS to update your Raspberry Pi. I would suggest using the Raspbery Pi OS Lite version, as we are not going to use anything in the graphical desktop, and it is much smaller.
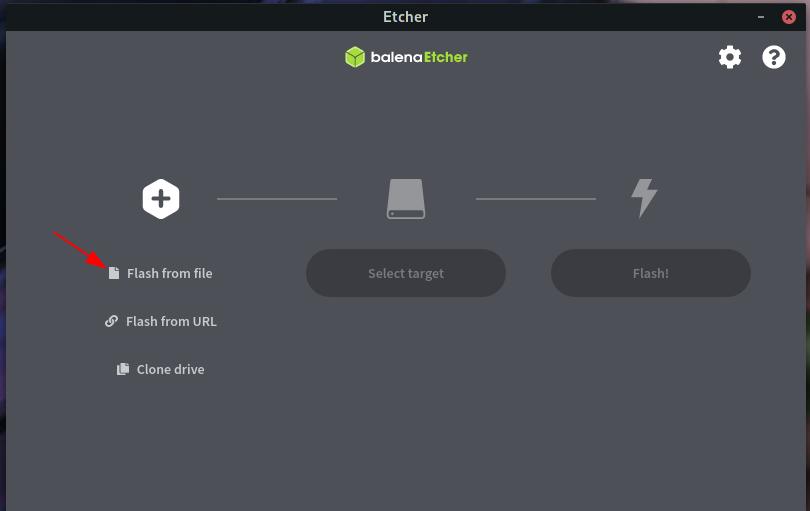
I prefer to use Balena Etcher due to its simplicity and it is cross-platform to flash ISO’s to microSD cards.
The Raspberry Pi CanaKit comes with everything you need to get started; including a microSD card and adapter. You will need to format that microSD card, and can use whatever method you like, but I use the disk option in Manjaro. GParted is another very powerful tool for disk management that you may use. I format mine to fat32 no matter what distribution I plan to put on my Pi.
We will use the option to select to flash from file.
Once selected, click the select target button, and choose your drive. Step 3 is flash. You now have your OS ready for your Pi.
Give it a while to boot, and once you are at your command prompt you are going to run the following commands to make sure your Raspberry Pi is up to date and ready.
sudo rpi-eeprom-update
sudo rpi-eeprom-update -a
Once updated you can shut down your Raspberry Pi and pull the card back out.
sudo shutdown -now
You will now erase the card of Raspberry Pi OS using Disk management or GParted if back to nothing.
The whole point of doing this to update your Raspberry Pi is to make sure that you are able to boot off of USB, which was an update after the Raspberry Pi was originally released.
Prepping the Pi for ESXI
You will need to download the Latest Raspberry Pi Firmware and the UEFI. Once you download those extract it to whichever folder you want.
You will want to copy the firmware-master/boot/ folder and copy all the usbdrive that you just recently formatted. Once they are finished copying, if you have any files that are kernel.img you should delete the files.
Now open the RPi4_UEFI folder and copy all of it’s content to the SD card as well. You will be prompted if you want to replace the file and yes you want to replace all the files.
Once those have all copied you will want to open the file name config.txt and add this line.
gpu_mem=16
Save your changes to the file, eject your microSD card, and you can remove it from your PC.
ESXI Download and Installation
We will need an ESXI Image to download for the installation. If you do not have a VMWare account you can go ahead and sign up. The account is free.
Once you have downloaded the image we will jump back into Etcher, and when we select the file we will use a separate usbdrive to flash the image on to. Now that the flash drive has the EXSI image on it eject it from your computer, and plug it into your Raspberry Pi. Your Raspberry Pi should have both the microSD card we already setup and the usbdrive we just flashed the ESXI image on.
Power up the Pi, and you will have to hit the escape key on your keyboard as soon as you see an image pop up on your Pi, so that we can enter the setup.
BIOS Changes to Unlock Ram Limit and Boot to USB Drive
You will see a small gray box once you hit the escape key and you are in the UEFI for the Raspberry Pi. The ram that you see on your Pi is incorrect, and we are going to fix that first. Using your arrow keys to navigate you want to use the following path Device Management > Rapberry Pi Configuration > Advance Configuration and hit enter on the line that says Limit RAM to 3 GB. Choose disable to get the full ram configuration on your Raspberry Pi. To save those changes hit F10 on your keyboard and press Y on your keyboard to save it.
Now hit the Escape Key on your keyboard until you get back to the original screen that is the gray box with your Raspberry Pi information. Use the arrow keys on your keyboard to highlight Continue and hit enter.
Your Raspberry Pi will reboot, and once again you will be hitting the Escape Key while it is booting up until you see the gray box with your Raspberry Pi information. You will go to Boot Manager, and you will use the arrow keys to highlight the name of your USB Drive.
As soon as the boot process starts you want to hit shift and o. If you are successful you will see runweasel cdromboot00 on your screen. You will want to add the following command (which is case sensative)
autoPartitionOSDataSize=8192
This will ensure that the ESXI image will not take over your whole microSD card.
ESXI Setup
Now you will see a gray and yellow screen with a progress bar at the bottom. This could take a while. Once it has finished, you will see a Welcome message. Hit enter to continue, and hit F11 to accept the EULA. The installer will scan your available drives. You will see the installer usb for now, but we want to get another USB Drive for the actual installation. Once inserted, you will hit F5 to refresh and choose the blank USB drive. Choose your layout and enter your root password. You will get a prompt to confirm the install and hit F11 to install. The install will complete and ask you to remove the installation USB drive from the Raspberry Pi, so remove it and hit enter to reboot.
It might take a little bit to completely shutdown and reboot, but once it does hit the Escape Key on your keyboard again to enter the UEFI for the Raspberry Pi. Using your arrow keys go down to Boot Maintenance Manager > Boot Options > Change Boot Order. Hit the Enter Key and a Box will pop up; select the USB drive name and use the + key to move it to the top. Hit enter and then F10 to save, and Y to commit the change. Now escape back to the main menu and select continue. ESXI should load.
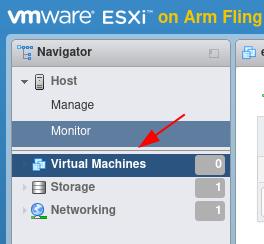
You will see your IP address in the yellow portion of the screen once everything is loaded. You can type that address in to access the web interface of your ESXI server.
Create Your Virtual Machine
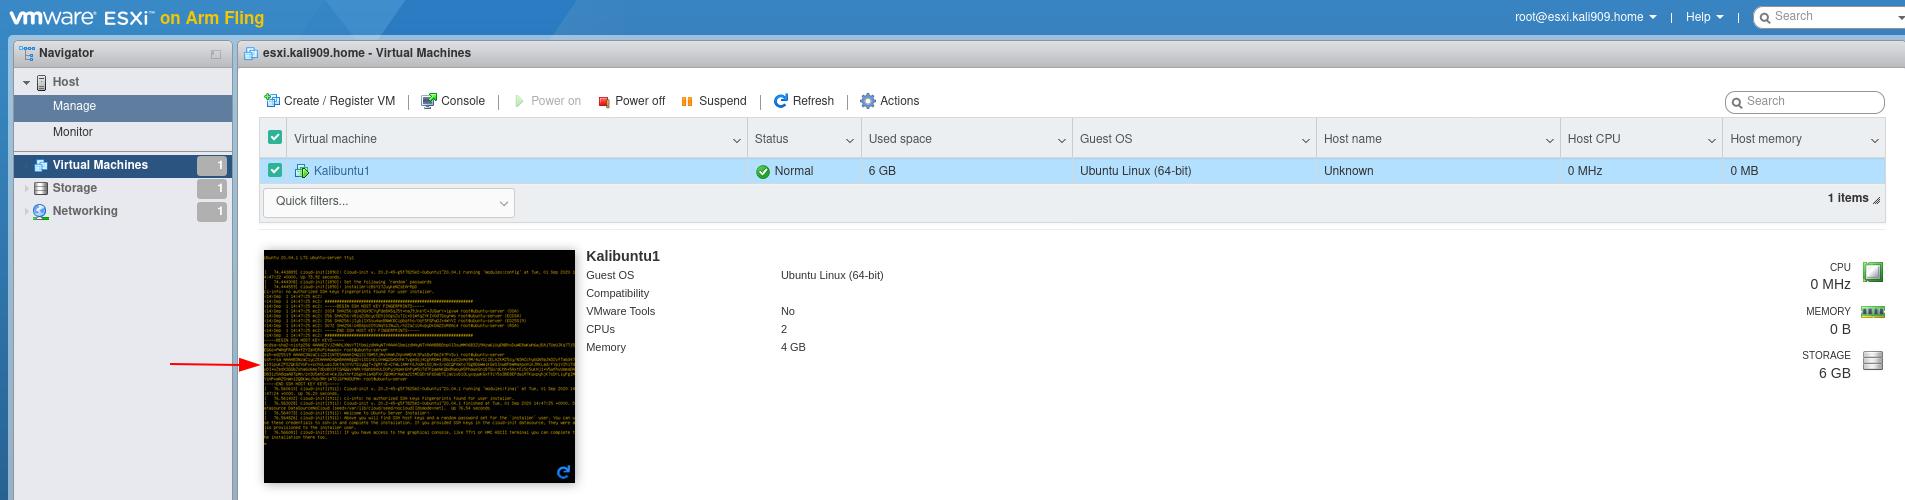
Once you have logged in you will see the Virtual Machines on the left.
When you download images you will want to make sure they are Arm compatible. I am going to start with Ubuntu Server.
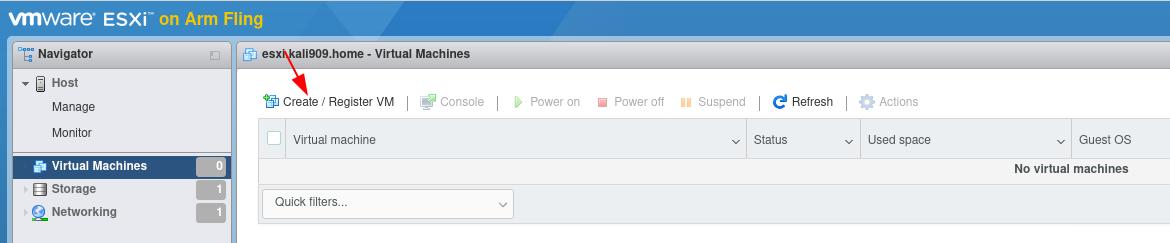
Let’s create a VM.
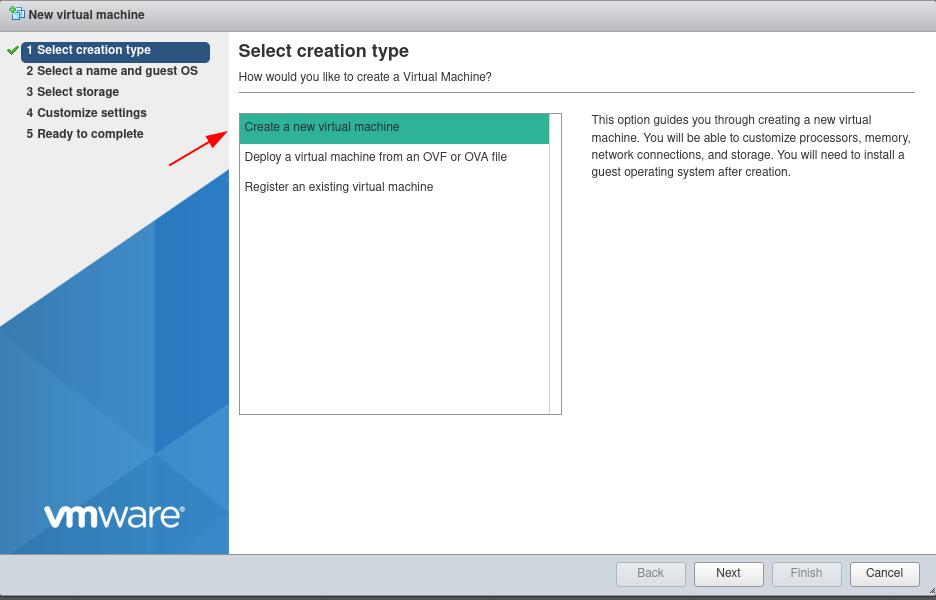
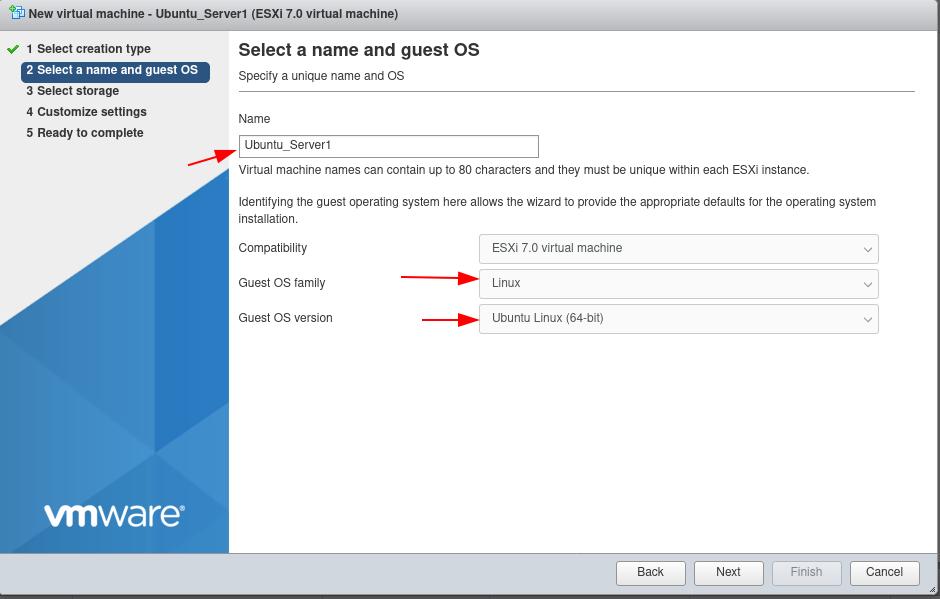
Leave the datastore as it is, unless you have another storage setup. The Customize settings is all your choice. However you want to divide up your CPU,Ram, and HDD space.
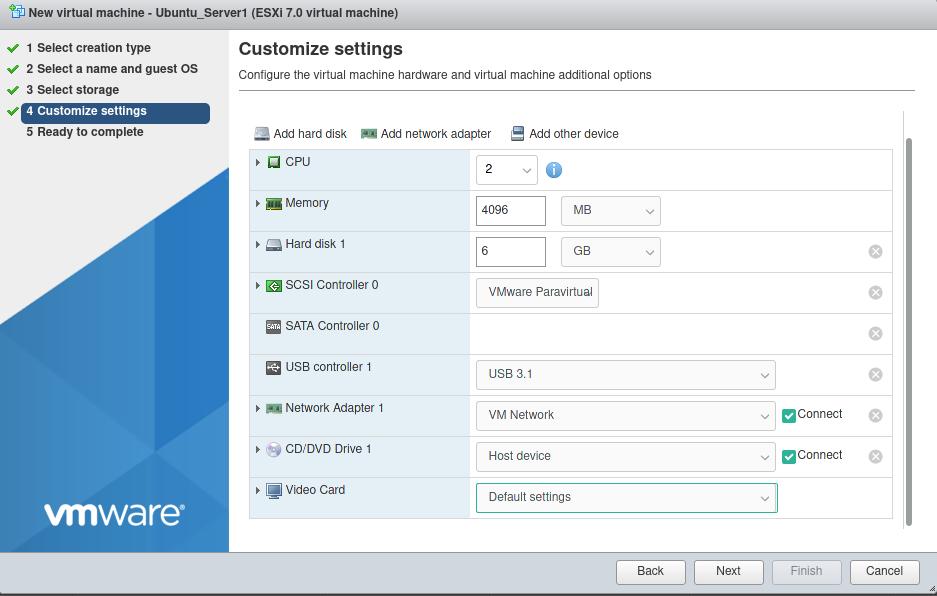
One change you will want to make is the CD/DVD Drive 1, you will change it from Host File to Datastore ISO File. Choose the option to Upload.
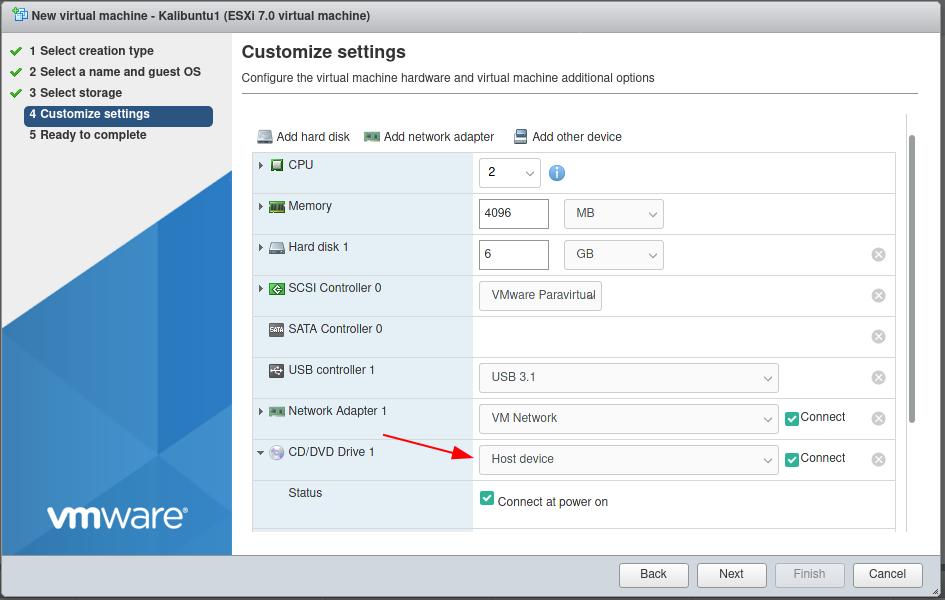
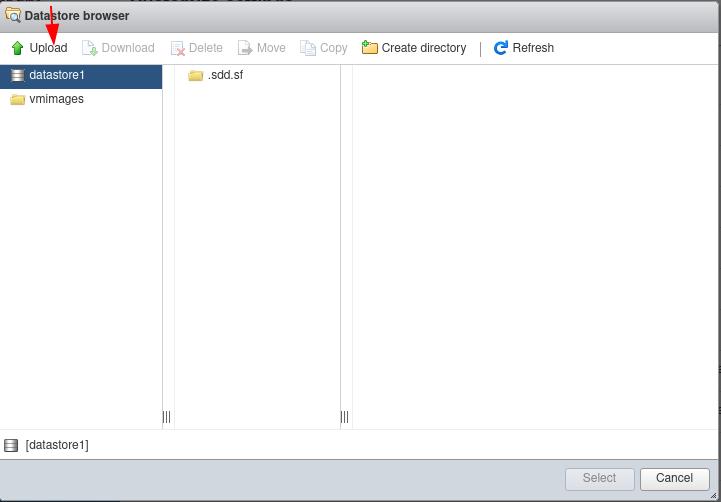
You can select the image once it is finished uploading.
Review and finish through the setup. Now you will want to select the image and power it on.

A small window will show underneath. You can click that window to interact with the server as it is setting up.
Enjoy! This will hopefully be part of a series to setup multiple VM’s in ESXI and play with Kubernetes and docker in a my lab setup.
The tutorial that started this project that I have enjoyed